GRADUATION
PROJECT
PRACTICE
Welcome to the process log of my practice. Here I will collect my whole visual process of my graduation project, including failures, discoveries and successes.
Ways of abstracting images 21.02
1
1
Today I did some analog / digital collages with a family image to see how I could abstract them.
QUESTIONS THAT AROSE:
1. How do I select an image? What is my reasoning behind it?
2. Can I add a meaning to the way I abstract the image / apply a specific technique that relates to my topic?
*
*
While experimenting with collage and print, I realised that I'm constantly choosing images of people that I have a close connection to and that are close family.
I realised that we create connections with images through visuals and stories that are told to use about these people.
What if I use subjects that are in my family or family images, but who I know nothing about on a personal level.
By using their image I want to give them importance, even though their person is unknown to me. I want the viewer to question who they are seeing and reflect on the relationships we build with certain ideas/people through archives.
MY FIRST FULL-COLOR SCREENPRINT
I thought this would be a good way to get back into screenprinting and to learn how to print CMYK images.
THINGS I WANT TO DO NOW THAT I HAVE BECOME
EXCITED ABOUT SCREENPRINTING AGAIN:
- experiment with large scale full-color prints on textile
- try different colour combinations
- combine with textile techniques (half full color/ half tufted?)
- experiment with varying amounts of detail
- LEARN MORE ABOUT COLOUR THEORY!!
IMPORTANT STEPS IN FULL-COLOR PRINTING
TEXTILE TECHNIQUES / TRADITIONS FROM MY ANCESTORS
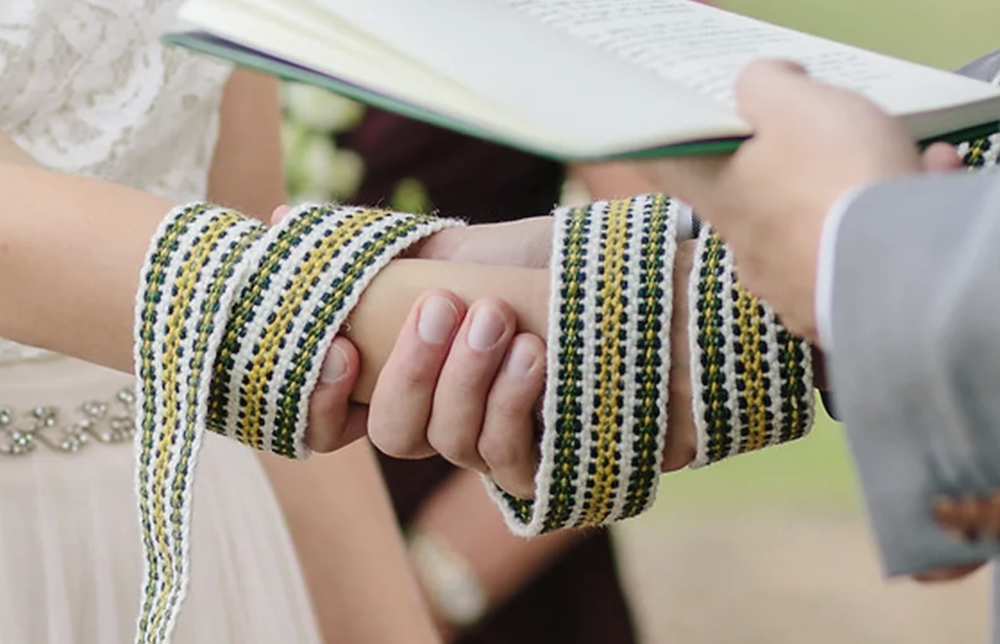
IRELAND
Crios Cords: traditional Irish woven belts
According to David Shaw-Smith, one of the pioneers of Irish folk craft research, ‘The crios were worn with a waistcoat or bástchóta, and home-spun tweed trousers.’ The weaving itself, was done with dexterous fingers, without the aid of a loom or mechanical device. The warp thread was stretched between two chairs or stools, or more traditionally, between one hand and one foot, tying the ends to the shoe. So, realistically these cords could have been made anywhere.
During penal times in Ireland (the 17th & 18th Centuries), it was not only the catholic religion and Irish language that was prohibited, Irish costumes and hair styles were also banned. This is probably the reason why most Irish folk costume only survived in remote parts like the Aran Islands. As a drowned fisherman could be recognized by his community from the cable weave of his Aran jumper, the choice of colours in a crios could be attributed to one weaver. Women would carefully hand down the secrets of their dyes to their daughters or take their recipes to the grave. The Irish crios typically contained 6 colours with a natural white background on each outside selvage. The women and men wore them around their waist; for a belt to fit it needed to be ‘as long as your outstretched arms’. The ends were furnished with three braids.
They were made by hand using a kind of rudimentary "loom". This is actually just a piece of wood to which warp (base woollen threads) are attached. The piece of wood is then placed under the weaver's feet. The warp is then pulled and kept stretched by left hand while the right hand is used to weave the weft (cross, pattern threads).
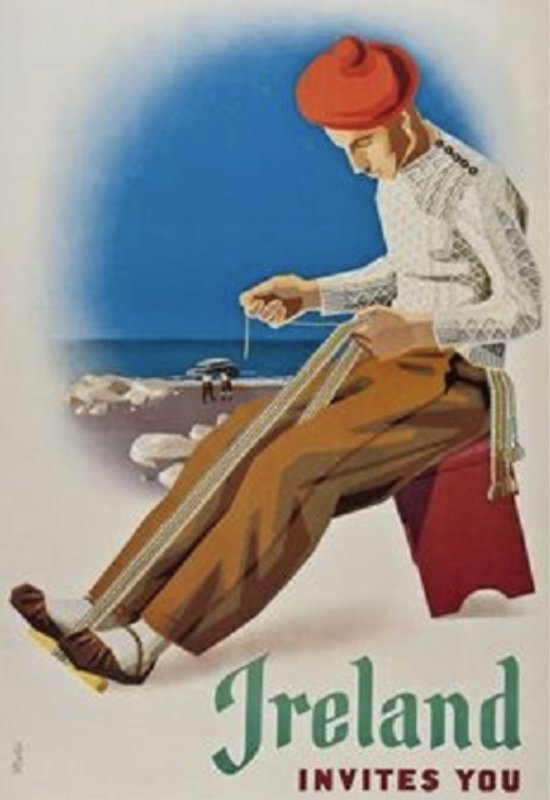
This 1950's tourist poster for Arran islands shows a man wearing traditional local clothes making a crios belt using such loom.
1
2
FAMILIY FOOTAGE
EXPERIMENTATION
Textile collage of different members of my dad's side. Thinking of ways of combining faces, deconstructing and reconstructing
1
2
WILLIAM (My mother's dad) on tufting canvas
- interest as using for main portraits
- William died in 1995 (suicide) -> this tragic and sudden accident has affected my mother ever since and has made her unable to talk about him
- the only thing she tells me is that he was happiest when outside: I want to highlight this by tufting the landscape around him so that it is visible on the backside. So when looking at the piece from the back only nature is seen, as this is the only information i know about my granddad
WANT TO TRY OUT:
- combining tufting and screenprinting
- embroidery on tufted areas, to squish certain elements
- blow up of the image to get an impression of the size of end piece
POTENTIAL OBSTACLES:
- colour of canvas
- glue that needs to be added on tuft -> it is on the front of screenprint so needs to be aesthetic
COLOUR RESEARCH BASED ON MEMORIES/STORIES
Close up of country side from the picture of William
Enniskillen, Northern Ireland country side snippets
-> Where Williams parents were from
From memory of Kelly (auntie) -> William used to plant daffodils alongside the roads
1
2
1
2
3
3
NOTE TO SELF:
- look for images of williams old home?
- where did he grow up?
- vague memory of a greenhouse, what was that from?
11/03
1ST TUFTING SESSION
- definitely need to try on bigger scale
- plan colours before (what landscape will I do?)
Being the first time machine tufting, I wanted to get a bit of a feel for the gun and how tufting works. I definitely want to try different lengths and materials to create the nature within the pictures.
WHAT I DID
POINTS TO CONSIDER IN FUTURE
EXTERNAL PARTNERS TO ASK FOR FEEDBACK
- Simon Uyterlinde (Screenprinting)
- Lizan Freijsen (Tufting)
- Jur Costanza (Mixed media)
15/03
SCREENPRINTING A1
- print on A1 tracing paper in photostudio
- do tests with printing one bitmap layer on dyed cloth and one with printing both bitmap on cloth
2
1
1
2
- possible other techniques -> weaving
CONS
- concept is not as clear -> both sides will not be as obvious
LOOK INTO
- dying fabric or yarn with flowers
16/03
COLOUR
17/03
KOBOR GARENS
20/03
IDEA CHANGE
After this week of tufting and peer feedback, I felt like some aspect was missing from my practice project. Because I am talking to family members again, that I hadn't talked to in a long while, I've noticed the importance of community when reconstructing memories.
For this reason I want to have a collaborative aspect within my project. I evaluated the techniques I was using, and have decided to change my concept slightly.
Instead of combining tufting and screen printing, I want to use screenprinting and weaving. I want to use the craft of weaving as it allows the audience to be apart of the construction and alteration of the piece.
I want to screenprint a portrait/collage of my grandfather and then leave it up to the audience to rearrange the portrait, allowing it to change over time and transform from clear to unclear.
TO THINK ABOUT
- who participates? (everyone, just me, family member?)
-> everyday the piece changes depending on the information I got from each family member, making it less clear when from a limited description for example.)
21/03
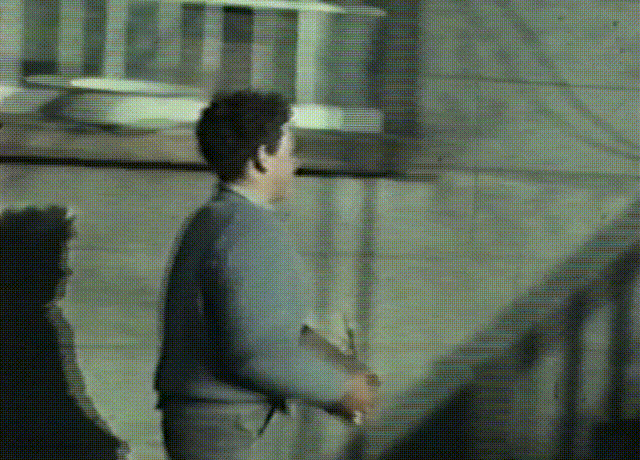
WATCHING VHS FOOTAGE AT A STRANGER'S HOUSE LOL
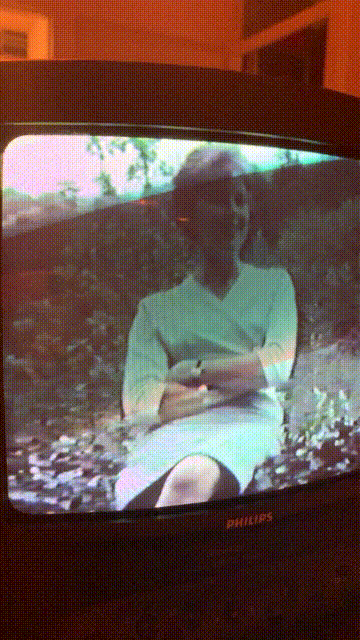
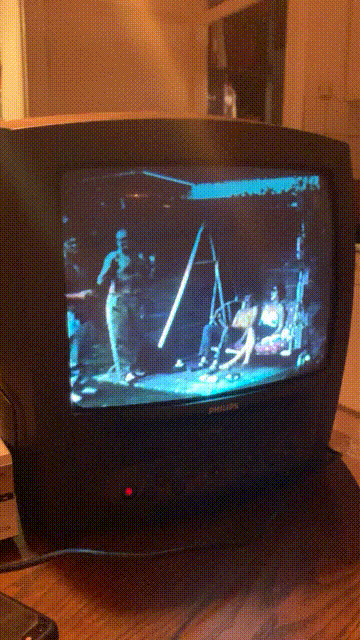
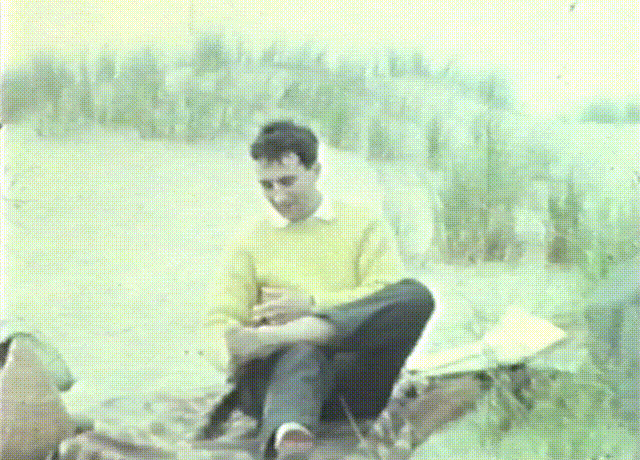
Two weeks ago I met a stranger in a bar, who was telling me that he uses a lot of analog film in his work. I told him that I had a vhs tape that I really wanted to digitise and he offered to help.
That's how I ended up sitting in a stranger's house, watching a vhs tape with footage of my irish family on it.
This was so exciting to see, because it shows loads of footage of my granddad that none of my family has seen for a very long time. Seeing him video made me oddly emotional, it was a very different experience to just looking at a photograph, because you see gestures, the way he walks, humour, etc. Things that I haven't been able to see in the past.
I was told that this would have been one of the earlier recordings made in colour and it is assumed that it was shot on an 8mm. We only got the sound to work at occasions and it sounded like elevator music had been added post filming, as these old cameras could not record sound yet.
I plan to use this footage and experiment with it within my work.
23/03
CREATING A LAYER OVER THE IMAGE
- what materials can I use to create a layer of unknown to the portrait:
> collage
> material layer on top of screenprint (transparent matt spray paint, epoxy, blockout glass, ...)
> smudging image while wet
> ink that reacts to a specific material
23/03
SCREENPRINTING & SMUDGE EXPERIMENTS
For my installation I really want to communicate the subjectivity and ephemeral aspect of memory. I therefore want to have part of the portrait smudged/unclear to create confusion in what is being seen/understood.
I tried a few things today that DID NOT work fully:
1. coat of emulsion and then print on top on clear plastic -> ink does not transfer properly
2. printed image on steel like material and then used squeegee to coat with layer of emulsion. At parts the squeegee was too aggressive and removed parts of the image.
24/03
CONTINUATION OF 23/03
printed on glass and then sprayed with dasty (degrease)
sprayed glass with dasty and then printed
printed normally and then smudged with hands
2/3 medium / 1/3 black ink
layer of lip balm and then print
layer of petrolium and then print, smudge with small ponge
print on glass and then smudge with clingfilm
1
2
1
SMUDGE EXPERIMENTS
2
3
4
5
6
7
3
3
3
4
4
5
6
7
25/03
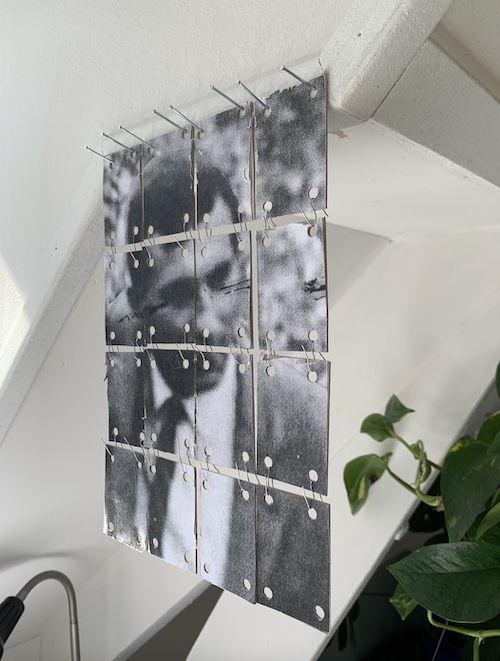
PROTOTYPE -- SMALL SCALE MODEL
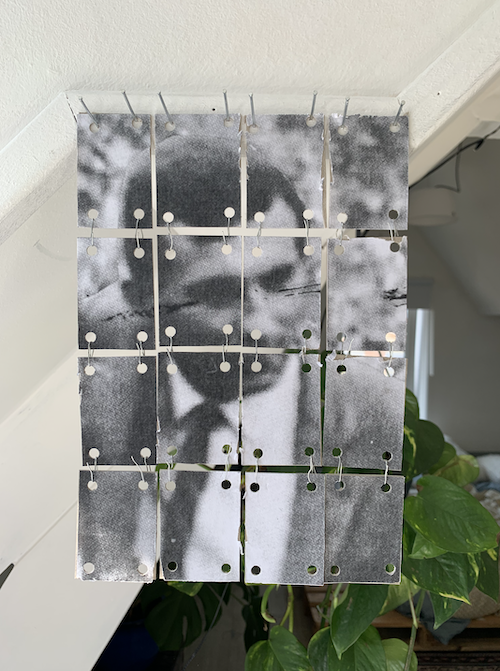
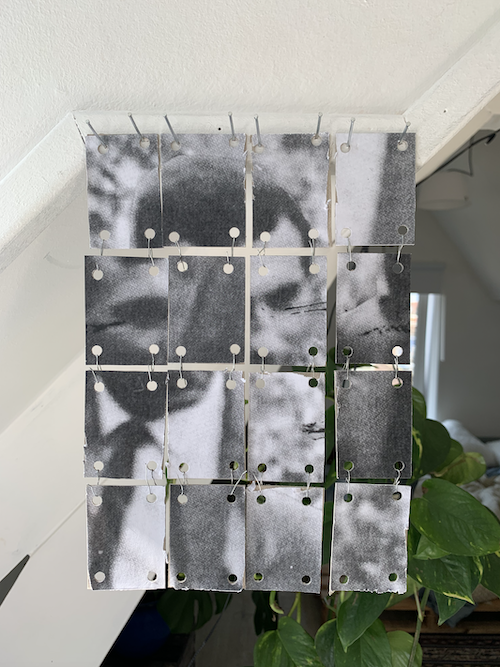
I created a small prototype of how I could build my large scale portrait to get an idea of how many panels i want and how i could attach each piece to eachother.
The idea is that the portrait changes throughout the graduation show, visualising the ephemeral characteristic of memory.
At first I wanted to base this variation on the different narratives and amount of information I receive from each family member. However, I have decided to base the changing portrait on theory and the different ways of recollecting stories/memories/narratives.
Based on my RD and its different chapters, the portrait will vary. For example:
STAGE 1
- family trees -> i started off with these and these gave me little to no sensation of getting to know my family
+ STAGE 2
- autobiographical memory -> what stories do I remember about him, are these true? memory making? importance of memory and autobiography
+ STAGE 3
- public archives -> depends on the environment/society you live in (could have empty planks of glas in portrait so you can see the people moving around it, shows the different outsider perspectives shaping stories)
+ STAGE 4
- transactive memory -> in my opinion, a very important way to recollect stories and to collect them as a community -> very cathartic/therapeutic (portrait is more clear or developing
Each stage does not represent one of the mentioned but is a combination of all, we build up narratives from different perspectives, which makes memory so rich and valuable.
I do not want to exclude narratives from the piece.
The pieces will be printed onto glass, with either the use of screenprinting or cyanotype.
28/03
DIGITALISING THE VHS TAPE W/ WALTHER
Wow what a hassle, but it was worth it. 4 hours later we managed to get the VHS recording onto my hard drive. I had no idea that you had to watch the tape in real time to capture it. Definitely massive thanks to Walther for helping me with this, must credit him in my final work!
Walther Eichler
www.musikarbeiter.nl
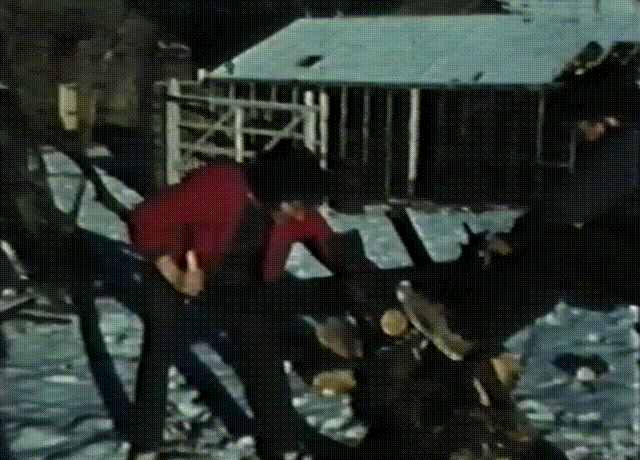
I called my mum while I was watching the tape and it was such a beautiful moment. She got really excited at seeing herself as a child and seeing her grandmother again, telling me how much of a good looking woman she was haha. "She was very sexy" "Always wore her best clothes while gardening"
I also noticed that a lot of the clips of Willie corresponded to the stories I've been told of him loving the outdoors, being in the greenhouse. There was even some shots of daffodils, which were the flowers he used to plant along the roads.
Throughout the tape he seems quite camera shy, always turning away from the camera or covering his face. He does not appear as much as my great-grandmother who seemed to love the camera.
29/03
MEETING W/ JEROEN ABOUT CYANOTYPE
DOMINIQUE SOMERS Anticoincidence Guides, 2019.
Ambrotype printed by Jeroen
1
1
Meeting with Jeroen was extremely helpful, he gave me some insight of what is possible with wet plate collodion and opened up a whole range of possibilities for me within this technique.
He also suggested other techniques apart from Cyanotype:
- ferrotype
- ambrotype
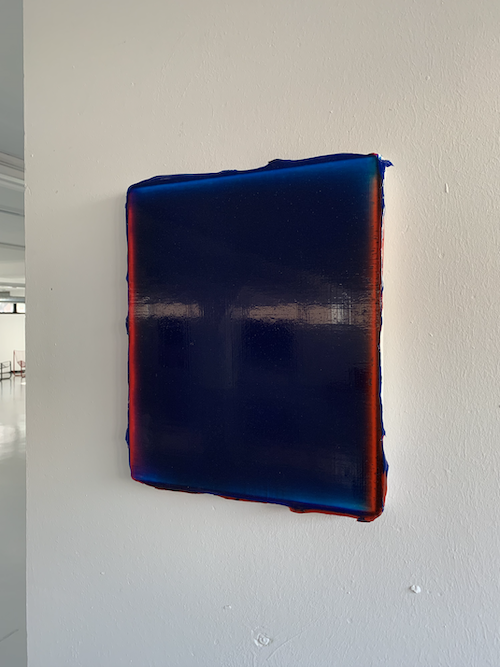
Ambrotype is easier to achieve on glass than Cyanotype because it does not need gelatin as a binder, which is challenging to use because of precise temperature, etc.
I think ambrotype could be an amazing technique for the project as it prints a negative. Therefore one needs a dark background to make the image appear. See Image 1.
I could imagine having black glass at the back of the prints, which can then make it visible from a certain point of view and unclear from another. See sketches, Image 2. I like the fact that it is not clear from each angle and that I can play with the dark background by removing some parts to make the image unclear in specific areas.
2
ROBYN HASTY Hourglass
3
3
In Hourglass, Robyn Hasty explores the physicality of the image, and paradoxically its fragility as a moment in time captured on glass. For this body of work, Hasty uses a collodion wet plate process, by which only two photographs may be produced during a two-hour shoot. The slowness of the process, unfolding over time, allows the subjects and the photographer to share in a moment of intimacy and vulnerability where the roles of power shift. As physical objects, Hasty’s photographs address time through their singularity and their fragility, always at risk of being lost should their support, a highly breakable sheet of glass, be broken. Suspended from the ceiling, the image appear and disappear as they are viewed in the round, touching on the uncertainty of their own existence. In these ways, the object nature of the “Hourglass” plates, both solid and delicate, is integral to their meaning, allowing them to confront the proliferation of imagery in the digital world, and the illusion of immortality offered by infinite multiplicity.
4
4
JINYOUNG LEE Memory of the Breeze
Inkjet Print on Transparent Papier(2 Pieces), 71x93cm, Wet-Plate Collodion Process(Ambrotype), Glass-Plate Negative 9.6×12.6cm(6pieces), Acrylic-plates 9.6(w)x12.5(h)x120cm, Iron Table, 9.6x95x120cm, Speaker, Amplifier,Sound and Glass Plate Negative Installation, installation View, Another Way of Seeing Gallery 2015
29/03
COLLAGE AND INTERESTING IMAGERY
1
1
Combining all the narratives that made up Willie (greenhouse, daffodils, outside)
2
2
I really love the natural blur of the VHS recording. I think this could be interesting to use within the portrait. Creates another layer of the unknown.
31/03
INTERESTING IMAGERY
12/04
REACTIONS TO VHS TAPE
13/04
SKETCHES FOR PUBLICATION
Sketch for a conversation with 3 people.
2
2
2
Fonts and font pairing
1
1
19/04
PRINTING WITH FLATBED PRINTER
Today I printed inverted images with white ink on the Mimaki printer. I want to print inverted images within the publication to link it to the style of the installation. I really enjoy how the image is only visible from specific angles on transparent foil.
I also thought it could be interesting to have a changing background that affects the visibility of the portrait:
- light
- different colour screen
- painted background with light sensitive ink
HOW TO USE MIMAKI
FILE NEEDS TO BE
- bitmap
- pdf 2001 -> not multiple, single file per print
- 300 dpi
STEPS
Open files in programm
Create white version of file, if the surface is slippery or print might get touched scratched -> add primer (15%)
Put material on point zero and tape down, make sure its completely flat so the printer doesn't sense a higher point while printing (also make sure the orientation fits the orientation shown on the monitor)
Go to print: RIP and Print
2
2
3
3
4
4
1
WHY AMBROTYPE?
History of ambrotype and how to spot one
1
1
WHY IS IT RELEVANT FOR MY PROJECT?
- has to be done on glass = fragile -> refers to the temporalities of memory and the fragility of identity. Also being precise and taking time with an image that is important to me (Part I RD))
- creates negatives and needs another layer to be understood (changes depending on the perspective you view it from) -> communicative memory (Part II RD)
- push the technique by building a portrait out of many glass plates -> large scale to question the importance that is given to a selected image (Part III RD)
Originally the image I have chosen did not exist. It was a fragment of the VHS recording from the late 60s. By transforming this second into a portrait through the unique process of ambrotype, I am creating an image that can only exist once.
REAL SIZE
FREQUENCY: 15 LINES/INCH
FREQUENCY: 10 LINES/INCH
FREQUENCY: 5 LINES/INCH
Today I had a call with Jeroen about what I need to prepare for the ambrotype process.
WHAT TO BUY
- glass (clear flow) @uniekglas.nl
- 250 ml bottle plastic thing harrolds
- old white tshirts cotton
TO PREPARE FOR TUESDAY
- prepare photo in squares
WHAT WE WILL DO TUESDAY
- learn how to clean plates
- test out projection of image
PRICE ESTIMATE
max 100 collodion
dveloper 50
fixer 20
cleaning 20
22.04
REAL SIZE PROTOTYPE
- I printed out the image how it will actually be and tried 3 different frequencies for the bitmap to see which one is best.
I personally preferred the 15 lines/inch version. And think the separate panels will have a charm in their abstractness.
STRUCTURE SKETCHES
5
TROUBLESHOOTING
- image is turning out as a white square:
-> go to original -> properties -> change from full color to mono
5
BEND ACRYLIC AND DRILL IN WALL
- not possible because acrylic is too thin to cut slit in
1
1
09/05
PROTOTYPING
PER PANEL:
A - 20x26x3mm clear acrylic (2X)
B - 20x13x3mm clear acrylic (1X)
Total: 62x A + 31x B = 7 acrylic sheets of 200x300mm
To connect the 3 acrylic sheets, I used M6 80mm bolts and connected them to a 9mm MDF sheet
NEXT STEPS
- order acrylic for all 31 panels (1 extra for shop) (done)
- order foil to test backgrounds on MDF
- look into coloured bolts
- calculate size of the board
25/05
PRODUCTION PHASE
I started printing last week. It was more experimenting and getting experience with the technique.
This week I was able to produce final pieces and really got the hand of applying the developer, which I struggled with before.
I am really enjoying the solitude of the dark room and the waiting times in between prints, it is great reflection time.
Jeroen plans to teach me how to varnish the plates next week. By Monday the 30th May, I plan to have finished all the plates.
08/06
BUILDING THE STRUCTURE